Clean code and Directives in Tailwind
Learn about how Tailwind works behind the curtains and customizing classes according to your need.
Hey! How is October going for you?
We met last in September and talked about TailwindCSS and no I did not get wiped off of the face of the earth :p
In the previous blog, we saw comparisons between Tailwind and VanillaCSS and a broad overview of it. In this blog we'll cover:
- Clean code in Tailwind
- Directives in Tailwind
- Customising base classes according to your need.
Clean Code in Tailwind
So for instance, you styled a button using Tailwind and the styling looks like this:
<button class="bg-green-400 rounded-sm hover:bg-green-600 hover:round-md...">Check out</button>
Now, this small button component is used multiple times in your application. Having this long line of code:
- reduces readability
- hard to maintain in case you make changes later on
To fix this issue, Tailwind has @ apply. Once you see how it is used, you'll be able to understand how it works:
//.html file
<button class="btn-checkout">Check out</button>

//.css file
.btn-checkout {
     @apply bg-green-400 rounded-sm hover:bg-green-600 hover:round-md...
}
@apply directive will apply the styling present on the right side of it to the class named btn-checkout. Using this class in your HTML file(as shown above) will give the desired output!
This is one way to increase readability.
However, your application might have card components that usually have a lot more styling than simple buttons, in that case, you can extract template components i.e., converting the reusable pieces into template partials or JavaScript components. Learn more about it here -> Extracting Components
Now that your code is readable, let's learn about Directives
Directives in Tailwind and Customisation
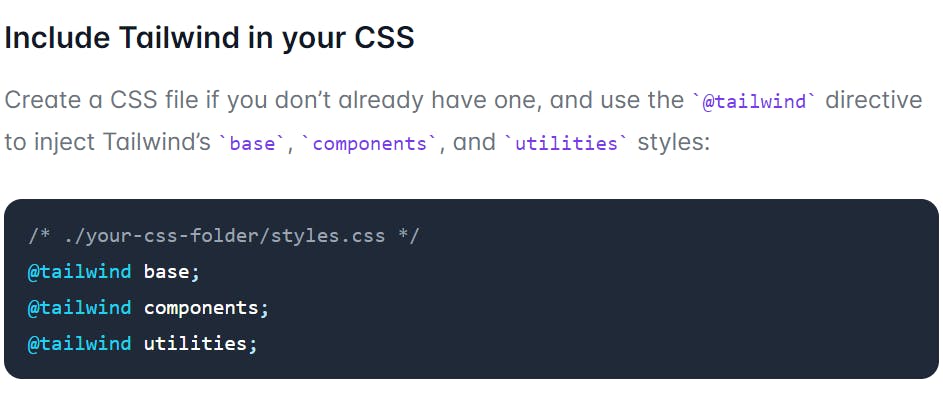
When you first install Tailwind (Installation Guide), you'll notice that they ask you to inject Tailwind's styles like this:

Here @ tailwind is the directive.
The use case for these directives comes in when we add base, components, and utilities to it.
Let's see what this means!
1. @tailwind base
This adds basic styling to the HTML elements that you'll use in your application. This means that Tailwind provides its styling to the elements so they look a little different than when you use VanillaCSS.
An example of this can be seen in my previous blog:
VanillaCSS:

TailwindCSS:
 (Notice the change in font)
Okay, that is tailwind base, now what if you want to change this base style.
Use @layer directive
This directive along with the base keyword tells Tailwind that you'd like to over-ride the base styles!
You can do this:
//.css file
@layer base {
   a {
       @apply text-violet-500 underline;
    }
}
So, now all your anchor tags will be styled with the mentioned properties!
2. @tailwind components
The use case for this is when you're using reusable pieces of code at multiple places in your file you can simply add it to your project's Tailwind Components.
This helps when you build your CSS and your component's consideration for purging!
The @apply directive we say before also works in a similar way.
This is how we can add new components to Tailwind:
//.css file
@layer components {
    .btn-checkout {
         @apply bg-green-400 rounded-sm hover:bg-green-600 hover:round-md...
    }
}
3. @tailwind utilities
This line imports all the utility classes that Tailwind supports. Everything we have written for the demo so far is executed because we have imported the utility classes they have defined.
Again, what if you want a certain value of padding but there is no utility class defined for it?
You can create your own utility class! Like this:
Suppose you want to specify padding of 5.5rem. If you search the official docs for a class that specifies this, you won't find it. Let's make this class then:
//.css file
@layer utilities {
     .p-22 {
          padding: 5.5rem;
     }
}
You can now use, p-22 class to specify the padding of 5.5rem.
NOTE: If you wish to use variants(hover, focus, etc) with YOUR utility class, it cannot be done the way it is done for pre-defined classes. It needs to be specified separately. Let's see an example:
p-20 class is pre-defined for padding of 5rem. To use variants on this class, we simply write:
hover: p-20.
p-22 is a class that you defined. So to use variants on this, do this:
//.css file
@layer utilities {
     .p-22 {
          padding: 5.5rem;
     }
     @variants hover {
          .p-22 {
               padding: 5.5rem;
          }
    }
}
Once we have mentioned that @variants will be used with a user-defined class, we can use it in the same way as pre-defined classes. Example: hover:p-22
That was a more in-depth idea of how Tailwind works behind the curtains!
I have just gotten started with using it and will keep sharing more as I learn!
Let me know what you'd like to read about next.
The video I used to get started with Tailwind: Tailwind: Beginner to Advance
If you'd like to connect and have a chat, reach out to me here: Neha Badiani
See ya!

